
Mulching Fall Leaves
Nov 07, 2022
Fallen leaves can make a big mess in your yard — they cut off oxygen and sunlight from the grass underneath, cause algae blooms in trapped water, and become a home for pests and insects. But what if there was an easy way to skip the hassle of raking, bagging, and burning while converting those leaves into free, nutrient-rich mulch?
Mulching the leaves every week as they fall from your trees will return nutrients back to the soil as the shredded leaves decompose. When used in your garden and flower beds, these mulched leaves will also protect plant roots, smother weeds, provide insulation, and help the soil retain moisture.
So how can you get started?
Collect your leaves
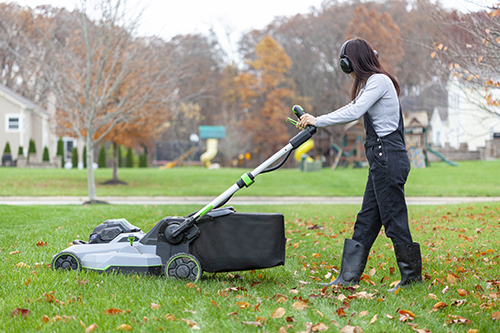
Often, the most efficient method for collecting leaves is to use a lawn mower with a bag attachment. Make sure your leaves are dry by waiting a few days after the most recent rain before you begin. Wet leaves are heavy and cumbersome to work with, and they could easily clog your mower. Set the blade high to avoid green lawn clippings in your mulch — the nitrogen in the greens will speed up decomposition and cause the mulch to need to be replaced more often. If you do not have a lawn mower, a leaf vacuum or rake will do the trick as well.
Shred your leaves
If you don’t use a lawn mower, you will have to shred the leaves after collecting them. A leaf shredder, or even a woodchipper, can be bought or rented for the job, but you can cut costs by using a weed eater, instead. Simply confine the leaves to a small area such as a garbage can and use the weed eater to break them down.
Spread your leaves
To effectively mulch around plants and flowers in your garden, spread your mulch three inches thick, keeping it three inches away from the base of plants to prevent plant rot and insect infestation. The leaf mulch will improve your garden’s water retention and insulation during the cold temperatures. Leaf mulch can be an excellent option for dealing with tough clay or sandy soil. As it composts, the mulch improves the soil texture to prevent compaction or erosion.
Store extra mulch
If you end up with more leaves than you need, store the extras in a leaf mold bin to turn them into an incredibly effective soil amendment for your summer garden. A wooden or wire bin is often the most popular choice, but for those of us who are truly low maintenance, a large garbage bag will also work. To aid the decomposition process, dampen your pile with water and cover with a tarp to trap the moisture and protect the leaves from wind. If you’re using a garbage bag, cut several slits in the plastic to allow oxygen to enter. Every month thereafter, check your pile and add more water if the leaves look too dry, and occasionally turn over the pile to increase oxygen exposure.
Don’t waste the nutrients currently sitting in the leaves all over your yard. Making mulch is a rewarding and cost-effective way to keep your lawn and garden in top shape this winter. For more lawn care tips and advice, contact your local Co-op.
For more content like this, check out the latest issue of The Cooperator.
Mulching the leaves every week as they fall from your trees will return nutrients back to the soil as the shredded leaves decompose. When used in your garden and flower beds, these mulched leaves will also protect plant roots, smother weeds, provide insulation, and help the soil retain moisture.
So how can you get started?
Collect your leaves
Often, the most efficient method for collecting leaves is to use a lawn mower with a bag attachment. Make sure your leaves are dry by waiting a few days after the most recent rain before you begin. Wet leaves are heavy and cumbersome to work with, and they could easily clog your mower. Set the blade high to avoid green lawn clippings in your mulch — the nitrogen in the greens will speed up decomposition and cause the mulch to need to be replaced more often. If you do not have a lawn mower, a leaf vacuum or rake will do the trick as well.
Shred your leaves
If you don’t use a lawn mower, you will have to shred the leaves after collecting them. A leaf shredder, or even a woodchipper, can be bought or rented for the job, but you can cut costs by using a weed eater, instead. Simply confine the leaves to a small area such as a garbage can and use the weed eater to break them down.
Spread your leaves
To effectively mulch around plants and flowers in your garden, spread your mulch three inches thick, keeping it three inches away from the base of plants to prevent plant rot and insect infestation. The leaf mulch will improve your garden’s water retention and insulation during the cold temperatures. Leaf mulch can be an excellent option for dealing with tough clay or sandy soil. As it composts, the mulch improves the soil texture to prevent compaction or erosion.
Store extra mulch
If you end up with more leaves than you need, store the extras in a leaf mold bin to turn them into an incredibly effective soil amendment for your summer garden. A wooden or wire bin is often the most popular choice, but for those of us who are truly low maintenance, a large garbage bag will also work. To aid the decomposition process, dampen your pile with water and cover with a tarp to trap the moisture and protect the leaves from wind. If you’re using a garbage bag, cut several slits in the plastic to allow oxygen to enter. Every month thereafter, check your pile and add more water if the leaves look too dry, and occasionally turn over the pile to increase oxygen exposure.
Don’t waste the nutrients currently sitting in the leaves all over your yard. Making mulch is a rewarding and cost-effective way to keep your lawn and garden in top shape this winter. For more lawn care tips and advice, contact your local Co-op.
For more content like this, check out the latest issue of The Cooperator.