Create Christmas Displays Like a Pro

Nov 29, 2021
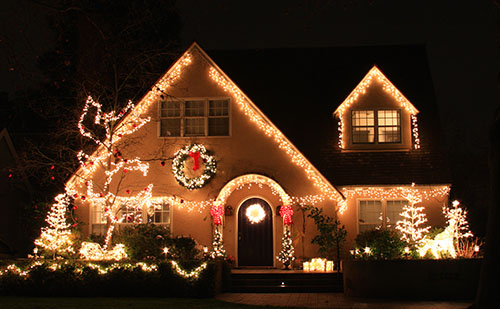

With the close of Thanksgiving comes a new focus — Christmas! Beautiful lighted displays will soon adorn the homes and yards of Tennesseans eager to get into the holiday spirit. With each addition to your Christmas decorations, though, there must be some extra consideration into the details and layout of the display.
 
            Whether this is your first time decorating the exterior of your home for the holidays, or you’re participating in a friendly competition to be the most festive house on the street, here are some basic steps to follow to get the job done efficiently and safely.
 
  1. Take a photo of your house
Taking a photo of your house from the street will give you the best visual to use when designing your display. Viewing your home from this perspective will also allow you to know exactly what your neighbors and other passerby will be seeing every time they drive by your house. Reference this picture when you are buying Christmas lights or other décor at the store so that you do not come home with unnecessary supplies.
 
  1. Measure
Measure where the lights will hang so that you know how many strands of lights are needed. While not completely accurate, measuring the width of your house at its base will keep you from making an extra trip up the ladder and give you an estimate of how many feet of lights will be necessary. It may also be helpful to measure certain areas in your yard where you could add inflatables, outdoor Christmas trees, or an outdoor Nativity scene if you so choose. 
 
  1. Determine what type of lights to use
The type of lighting you use will ultimately determine the look and feel of your Christmas display. While some people prefer pure white LEDs to achieve an “icy” look, others prefer warm white LEDs to create a cozy atmosphere. Also, ensure that the lights you buy are specified for outdoor use. While this may seem like common sense, it is easy to accidentally bring home the wrong type of lights from the store, costing you unnecessary time to correct the problem.
 
  1. Test the lights on your décor
Whether you are using brand-new lights from the store or lights that have been in your garage for a year, make sure to test each strand before you hang them. It is easy for a bulb to become displaced or damaged, preventing the entire strand from lighting up, and there is no worse feeling than when you find this out after they are already hung on your roof. Many other yard decorations contain bulbs as well that can be broken after rough handling or bad packaging. Test the electrical integrity of your displays before going through the trouble of setting them up.
 
  1. Properly secure your décor
When hanging Christmas lights, plastic light clips will not only eliminate the need for nail holes in the side of your house, but will also save you an immense amount of time in the hanging process. Simply snap the clips onto your light strands 6 to 12 inches apart and attach to your gutters, siding, railing, or roofline. Clips will also make the tear-down process much easier and can be stored to use again next year. When using inflatables and other yard decorations, ensure that they are properly secured to the ground and will not blow away. This can best be achieved by staking them into the ground or using cables to tie them to the ground. Outdoor greenery and ribbon can easily be secured to your railings with zip ties.
 
  1. Turn on and enjoy
The last, and best, part of the process is being able to take a step back and enjoy the beautiful display that you have just created! Make sure that all of your electrical wires are plugged into an outdoor-rated extension cord and outdoor outlet to prevent shock due to exposure to moisture.
 
If you don’t have the tools you need to safely set up your Christmas décor, don’t take shortcuts and risk having a holiday fiasco. Simply stop by your local Co-op for supplies such as ladders, tape measures, and extension cords for hanging lights, cables and stakes for tying down yard displays, zip ties for securing greenery and ribbons, and more.
 
For more content like this, check out the latest issue of the Cooperator.

Read More News

Nov 04, 2024
A chainsaw is essential for tackling tough jobs like felling trees or clearing fallen limbs. However, when your chainsaw starts to feel sluggish and struggles to cut, it’s often a sign that the chain needs sharpening. Regular sharpening can save you time, money, and energy – plus, it’s a task you can easily handle yourself with a few basic tools.
Oct 28, 2024
Wondering what to do with your pumpkins after the Halloween fun is over? Don’t toss them in the trash! Instead, find ways to recycle and repurpose your pumpkins — even if they’re starting to look a little wilted.
 
Oct 21, 2024
As temperatures cool in mid-to-late October, it’s the ideal time to aerate your lawn. Aeration, the process of puncturing small holes in the soil, allows water, nutrients, and air to penetrate deep into the grass roots. This simple practice promotes healthier, stronger grass by loosening compacted soil and reducing thatch buildup — the layer of organic material that can block water and nutrients from reaching the roots.